There’s a special kind of panic when your trusty iPod Touch 6th Gen suddenly goes dark. No lights, no response, just a sleek, silent brick where your music, photos, and apps used to live. Before you declare it deceased and start shopping for a replacement, take a deep breath. Often, this isn't the end. With the right troubleshooting & repair guides for iPod Touch 6th Gen, you can bring it back to life, whether it’s a simple software hiccup or a more complex hardware challenge.
As a journalist and tech enthusiast who's spent years untangling digital woes, I can tell you that many common iPod Touch issues—like refusing to turn on—are surprisingly fixable from home. We’re going to walk through the diagnostics and fixes step-by-step, transforming that initial dread into a triumphant "Aha!" moment.
At a Glance: What You'll Learn
- Why your iPod Touch might be dead: Common culprits, from drained batteries to software bugs.
- First-response actions: How to properly charge and force restart your device.
- Advanced software fixes: Navigating Recovery Mode and the powerful DFU Mode.
- Tackling physical damage: Tips for water damage, charging port issues, and battery concerns.
- When to call in the pros: Knowing when DIY ends and professional help begins.
- Keeping your iPod healthy: Simple preventative steps to avoid future issues.
Understanding Your iPod Touch 6th Gen: A Quick Check
Before we dive deep, it's worth a moment to appreciate the enduring appeal of the iPod Touch 6th Gen. Released in 2015, it offered a powerful A8 chip, an 8MP camera, and still runs many modern apps, making it a fantastic portable media player or a device for kids. Understanding which specific model you have is crucial for any repair; Apple produced seven distinct generations of iPod Touch. You can often identify yours by checking the model number in Settings (if it turns on) or by comparing physical features. For a comprehensive overview of this particular model, you might find our dedicated iPod touch 6th generation guide helpful.
The issues plaguing your device aren't always unique to the 6th Gen, but the solutions we'll discuss are specifically tailored for it.
The Silent Treatment: Why Your iPod Touch Might Refuse to Turn On
Your iPod Touch might be playing dead for several reasons, ranging from simple power issues to more serious internal damage. Understanding the potential causes can help you zero in on the right solution:
- Drained or Faulty Battery: The most common culprit. A completely depleted battery might need more than a quick plug-in to respond.
- Software Glitches or Corrupted OS: Sometimes the operating system itself can freeze or become corrupted, preventing the device from booting up.
- Faulty Charging Port: If power isn't reaching the battery, even a healthy battery can't charge.
- Damaged Screen: A non-responsive or black screen doesn't always mean the device is off; the screen itself might be the problem.
- Water Damage: Moisture is a silent killer for electronics, causing internal shorts or corrosion.
- Overheating: Prolonged high temperatures can cause the device to shut down to prevent damage.
- Damaged Logic Board or Internal Components: The brain of your iPod Touch; damage here can be complex.
- Malfunctioning Power Button: If the button itself isn't registering presses, it won't turn on.
Don't let this list overwhelm you. We'll start with the easiest and most common fixes and progressively move to more advanced solutions.
First Aid for Your iPod Touch: Basic Troubleshooting Steps
When your iPod Touch goes unresponsive, the first steps are always about power and a good old-fashioned reset. These basic troubleshooting steps resolve the vast majority of "won't turn on" issues.
1. Power Up: Charging Your Device Properly
It sounds obvious, but a truly dead battery needs time and the right equipment to revive.
- Use Original or Certified Accessories: Always use the original Apple charger and USB cable, or certified MFi (Made For iPhone/iPod) alternatives. Generic chargers might not provide sufficient power or stable voltage.
- Plug It In: Connect your iPod Touch to a reliable power source. A wall outlet is preferable to a computer USB port, as it typically delivers more consistent power.
- Give It Time: Allow the device to charge for at least 30 minutes to an hour. A deeply discharged battery needs significant time to accumulate enough charge to even display the charging indicator or the Apple logo.
- Check for the Charging Screen: After some time, you should see a charging icon or the Apple logo appear, indicating it's receiving power. If not, try a different cable, charger, or outlet.
2. The Hard Reset: Force Restarting Your iPod Touch
Sometimes, the device is on but just frozen. A force restart can kick it back to life without erasing any data. This is different from simply turning it off and on.
- Simultaneous Press: Press and hold both the Sleep/Wake button (on the top right edge) and the Volume Down button (on the left side) at the same time.
- Hold for 10 Seconds: Keep both buttons held down for at least 10 seconds. Don't release them if you see a "Slide to power off" slider – keep holding.
- Look for the Apple Logo: Release the buttons only when the Apple logo appears on the screen. If it doesn't appear after 30 seconds, the device might truly be out of power or have a more severe issue.
3. Visual Inspection: What to Look For
While you're waiting for it to charge or attempting a force restart, take a moment to carefully inspect your iPod Touch.
- Physical Damage: Look for any cracks on the screen, dents on the casing, or bent corners. Significant impact damage can affect internal components.
- Charging Port Cleanliness: Peer into the charging port. Is it full of lint, dust, or debris? This can prevent the cable from making proper contact. A flashlight can help you see inside.
- Water Damage Indicators: While the iPod Touch 6th Gen isn't waterproof, it does have Liquid Contact Indicators (LCIs) that change color when exposed to water. On the 6th Gen, these are typically visible in the headphone jack or near the charging port. A red indicator signifies water damage.
Diving Deeper: Advanced Software Rescues
If basic steps haven't revived your iPod Touch, the problem might be a deeper software issue. Don't worry, Apple provides recovery options that can often fix a corrupted operating system. You'll need a computer with iTunes (or Finder on macOS Catalina and later).
1. When Recovery Mode Calls: A Safety Net for Software Glitches
Recovery Mode is a state where your iPod Touch can communicate with iTunes to restore or update its software, even if it can't boot normally. This is often the first advanced step for software problems.
- Connect to Computer: Use your original USB cable to connect your iPod Touch to a computer running iTunes (or Finder).
- Initiate Recovery Mode:
- Press and hold both the Sleep/Wake button and the Volume Down button simultaneously.
- Hold them for about 10 seconds. Don't release when the Apple logo appears.
- Continue holding until you see the Recovery Mode screen (an image of a computer icon and a lightning cable).
- iTunes/Finder Prompt: Once in Recovery Mode, your computer will detect the device and iTunes/Finder will prompt you to "Restore" or "Update" your iPod.
- Update: Try "Update" first. This attempts to reinstall iOS without erasing your data. If successful, your iPod will restart.
- Restore: If "Update" fails or doesn't resolve the issue, select "Restore." This will erase all data on your iPod and install a fresh copy of iOS. Backup your iPod regularly to avoid data loss.
2. The Last Resort: DFU Mode for Deep Software Issues
DFU (Device Firmware Update) Mode is the deepest type of restore you can perform on an iOS device. It bypasses the operating system entirely and allows iTunes to install new firmware. This is often used when Recovery Mode fails or if the device is stuck in a boot loop.
Caution: DFU Mode will erase all data on your iPod Touch. Ensure you have a backup if possible.
- Connect to Computer: Plug your iPod Touch into your computer with iTunes/Finder open.
- Start the Process:
- Press and hold the Sleep/Wake button for 3 seconds.
- Immediately, and while still holding the Sleep/Wake button, also press and hold the Volume Down button. Hold both buttons for 10 seconds.
- Release the Sleep/Wake button, but continue holding the Volume Down button for another 10 seconds.
- Black Screen Confirmation: Your iPod Touch screen should remain completely black. If you see the Apple logo or the "Connect to iTunes" screen, you've entered Recovery Mode instead of DFU Mode, and you'll need to restart the process.
- iTunes/Finder Detection: iTunes/Finder will detect your iPod in "recovery mode" (even though it's technically DFU Mode) and prompt you to restore it. Follow the on-screen instructions.
3. Reinstalling from Scratch: The "Restore iPod" Option
If your iPod Touch still boots, but is experiencing frequent crashes, freezes, or unusual behavior, a full software restore can often clear out software corruption. This is done directly within iTunes/Finder when the device is recognized.
- Connect Your iPod: Link your iPod Touch to your computer.
- Open iTunes/Finder: Select your device in the sidebar.
- Click "Restore iPod": You'll find this option on the summary tab.
- Follow Prompts: iTunes will guide you through the process, downloading the latest software and installing it. This will erase all data and settings, returning your iPod to its factory defaults.
4. Keeping Up-to-Date: Software Updates Through iTunes
Sometimes, simple bugs or compatibility issues can be resolved with a software update. If your iPod Touch can turn on but is acting erratically, ensure its operating system is current.
- Connect and Select: Connect your iPod Touch to your computer and select it in iTunes/Finder.
- Check for Update: On the summary tab, click the "Check for Update" button.
- Install: If an update is available, follow the on-screen instructions to download and install it. This typically preserves your data.
When Hardware Fights Back: Addressing Physical Problems
If software solutions yield no results, or if you've noticed physical damage, you might be dealing with a hardware issue. Some of these can be addressed yourself, while others require professional intervention.
1. The Splash Zone: Dealing with Water Damage
Water damage is insidious, and immediate action is crucial to minimize its impact.
- Power Down Immediately: If your iPod Touch got wet, turn it off right away. Do not attempt to turn it back on.
- Remove Accessories: Take off any cases, screen protectors, or anything that might trap moisture.
- Dry Exterior: Use a soft, lint-free cloth to gently dry the exterior surfaces.
- Air Dry: Place the device in a dry, well-ventilated area. Airflow is key. Leave it for at least 24-48 hours.
- Desiccant Aid (Optional): For better moisture absorption, place the iPod in a sealed container with desiccant packets (like those found in new shoes or electronics) or uncooked rice. The rice method is a popular home remedy, though its effectiveness is debated among experts compared to professional drying agents. Ensure the device is completely submerged in the desiccant.
- Avoid Heat: Do NOT use a hairdryer, oven, or direct sunlight to dry your device. Extreme heat can cause further damage to internal components.
- Wait and Test: After sufficient drying time, attempt to turn it on. Be prepared that water damage can sometimes cause long-term, intermittent issues or require component replacement.
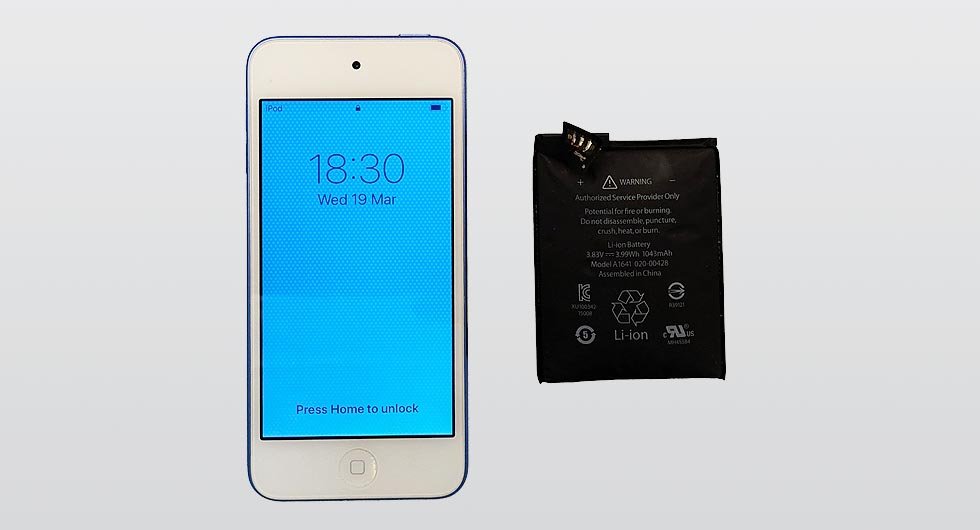
2. Power Drain: Battery Replacement Considerations
If your iPod Touch only works when plugged in, has extremely poor battery life, or frequently shuts down, a failing battery is highly probable.
- DIY vs. Professional: If your iPod Touch is out of warranty, you might consider replacing the battery yourself. Kits are available from reputable suppliers that include the battery and necessary tools. However, this requires careful handling of delicate internal components and small connectors.
- Finding a Reputable Supplier: Always source replacement parts from trusted vendors known for quality components, not cheap generic knock-offs.
- Follow Instructions Meticulously: If attempting a DIY replacement, follow step-by-step guides (often video tutorials are best) specific to the iPod Touch 6th Gen.
3. Connectivity Woes: Cleaning or Replacing the Charging Port
A dirty or damaged charging port can mimic a dead battery.
- Gentle Cleaning: If you suspect debris, use a soft, non-metallic tool like a wooden toothpick or a dedicated electronics brush (never metal!) to gently dislodge lint or dirt from the charging port. Be extremely careful not to damage the internal pins.
- Compressed Air: A quick burst of compressed air can also help, but hold the can upright to prevent propellant from entering the port.
- Port Replacement: If cleaning doesn't help, the charging port itself might be damaged and need replacement. This is a more intricate repair, often requiring soldering, and is best left to experienced technicians.
4. Beyond the Basics: Other Hardware Concerns
For issues like a truly malfunctioning power button (not just a software glitch), a damaged logic board, or other internal component failures, DIY repair becomes significantly more complex and risky. These are the points where professional diagnosis and repair become the most sensible and cost-effective option, especially if you value your device.
Seeking Professional Help: When DIY Isn't Enough
You've tried everything, exhausted all troubleshooting & repair guides for iPod Touch 6th Gen, and your device is still unresponsive. This is when it's time to consider professional assistance.
Apple Support vs. Third-Party Repair
- Authorized Apple Repair Center: If your iPod Touch is still under warranty or if you have AppleCare+, this is your first stop. Apple's technicians are trained specifically on their devices, use genuine parts, and their repairs come with a warranty. Even out-of-warranty repairs from Apple are often reliable, though they can be more expensive.
- Third-Party Repair Service: If your device is out of warranty and you're looking for a potentially more affordable option, a reputable third-party repair shop can be a good choice.
- Do Your Research: Look for shops with excellent reviews, transparent pricing, and guarantees on their work.
- Beware of "Voided Warranty": Be aware that using a third-party repair service will almost certainly void any remaining Apple warranty on your device.
- Part Quality: Inquire about the quality of the replacement parts they use. Genuine Apple parts are generally preferred, but high-quality aftermarket parts can also be acceptable.
Warranty Considerations
Always check your device's warranty status before attempting any repairs. Self-repair, especially opening the device, will void your warranty. If it's still covered, a professional repair through Apple is almost always the best route.
Preventative Maintenance: Keeping Your iPod Touch Healthy
An ounce of prevention is worth a pound of cure, especially with electronics.
- Regular Backups: The single most important preventative measure. Back up your iPod Touch regularly to iCloud or your computer. If the worst happens, at least your data is safe.
- Charge Wisely: Avoid letting your battery completely drain to 0% often, and don't leave it plugged in at 100% for extended periods. Modern lithium-ion batteries prefer to be kept between 20% and 80%.
- Protect from Drops and Spills: A good quality case and screen protector are inexpensive insurance against accidental damage.
- Keep Ports Clean: Periodically check and gently clean the charging port and headphone jack to prevent lint buildup.
- Avoid Extreme Temperatures: Don't leave your iPod Touch in direct sunlight, a hot car, or in freezing conditions. Both extremes are detrimental to battery life and internal components.
- Update Software: Keep your iOS up to date. Software updates often include bug fixes and performance improvements that can prevent issues.
Your iPod Touch: A Final Verdict
Bringing a seemingly dead iPod Touch 6th Gen back to life can be incredibly satisfying. By systematically working through these troubleshooting & repair guides for iPod Touch 6th Gen, you've empowered yourself to diagnose and fix many common problems. Whether it's a simple force restart, a deeper software restore, or even a careful water damage recovery, you now have the knowledge to give your device the best chance at a full recovery.
Remember, if you reach a point where you're uncomfortable proceeding, or if the problem requires specialized tools and expertise, don't hesitate to seek professional help. The goal is to get your music, apps, and memories flowing again, one troubleshooting step at a time.